Sunday, July 24, 2011

That's It, I Fold!

No, I'm not quitting the blog! I'm here to talk about the very delicious, but practically lost art of a sponge cake. A sponge cake, or "Genoise" cake is any cake that is leavened solely through air--specifically, through the act of whipping eggs until they are extremely light and fluffy.

No one makes sponge cakes anymore. In fact, that particular joke from the Amelia Bedelia books was completely lost on me as a child. (When instructed to make a sponge cake by her employer, she cuts up a sponge and puts it in a cake. Until a few years ago, that's what I would have done.)

The other day we found ourselves with a plethora of eggs thanks to the CSA egg share we bought this summer. As a baker, there are several things you can do to use up eggs like pastry cream and lemon curd. But if you're baking something and you don't feel like claufouti (it's like a sweet quiche), cake is best way to go and no cake uses quite as many eggs as sponge cake.

We recently had a dessert at The Girl and the Goat restaurant in Chicago--one of the most popular restaurants in the city--and it was so delicious I proposed to the pastry chef. (The pastry chef was a woman, so I guess it would be a civil union. They're finally legal here in Illinois--YAY!) It consisted of spongecake, lime curd, whipped cream, strawberries and a flash-fried basil leaf. Why not try and remake this fabulous dessert? Well, not entirely. The season for strawberries is over, but cherries are in season and cherries and limes go well together.

So let's make sponge cake--sponges not included. I'm using the Moist Sponge Cake recipe from James Peterson's Baking.

Butter and flour for the round cake pan (or not)
1 tsp. vanilla extract
1/4 cup milk or heavy cream
3 tblsp butter
3 whole eggs, warmed*
3 egg yolks, warmed*
3/4 cup plus 2 tblsp white sugar
3/4 cup cake flour (yes, cake flour)

*Eggs froth up better if they're warm. If you're making this sponge cake in the winter or in a cool house, place the eggs in a bowl of warm (not hot) water for about 5 minutes. You can stick the egg yolks in a small covered container and do the same. It's summer here and our 8th day of 90+ temps, so I just left them out in our kitchen for a couple of hours.


Remember eggs are best separated when they're cold, though.

If you're making a sheet cake, preheat the oven to 400 degrees and line a 13"x17" sheet pan with parchment paper. I'm making a 9" round cake, so preheat the oven to 350 degrees. The instruction in the recipe is to butter and flour the round cake pan. I prefer to spray the pan with EverBake, place a round piece of parchment paper in the bottom and spray the top of that. Who wants a film of flour on their cake? Ick. You can pick up EverBake online at the King Arthur Flour website. Why buy this instead of PAM that's cheaper and you can pick up in a local grocery store? First of all, it works better when it comes to release. I've tried PAM with a variety of cakes and it's hit or miss. Sometimes the cake releases okay and sometimes it doesn't. It's scorchless, so it won't turn your pans dark--this is a big deal to me since I buy commercial-grade pans (the shiny kind) since they brown the cakes more evenly. Also, it lasts way longer than anything I've ever bought.


Combine the vanilla, milk and butter in a small saucepan, bring to a simmer, and cook just long enough to melt the butter. Remove from the heat and set aside. Normally, when I'm baking, I bust out my All-Clad copper core, but this is a tiny job. My little Faberware non-stick will work just fine.


Place the warmed eggs, egg yolks and sugar into the bowl of your stand mixer, snap in your whisk attachment and mix on high speed for about 4-5 minutes or until the batter hits the "ribbon" stage. (more on that in a minute) I hope you've got a stand mixer. It takes about 12 minutes if you're whisking constantly by hand (but you'd better have the biggest biceps known to man), and about 20 minutes with an electric hand mixer. Why so long with the hand mixer? Good question. Probably because most hand mixers don't have a whisk attachment and the whisk is what incorporates all that air into the eggs to make them light and fluffy.

The "ribbon" stage is when the beater is pulled up and the batter pours slowly from the beater into a figure 8 that stays on the top of the batter for several seconds. Also, the mixture looks kind of like this:


Once you're at the ribbon stage, carefully transfer the egg mixture into a large wide bowl. This helps when it comes to incorporating the flour. Pour the milk/vanilla/butter mixture that you melted down the side of the bowl and carefully fold it into the egg mixture.

Folding... There is no way I can describe to you what this is. I recommend doing an internet search for videos that show the process. If I had a videographer, I could have taped myself doing it, but folding isn't really something I can do one-handed and I'm not Zaphod Beeblebrox. (That's a nerdy Hitchhiker's Guide to the Galaxy reference...he had three arms.) Basically, it's gentler way of stirring to make sure that we don't deflate our eggs too much.

Once the milk/vanilla/butter mixture is incorporated, sift the cake flour over the entire surface of the batter IN THIRDS (this is why the wide bowl). Fold the flour in until it's fully incorporated before adding more. Did you hear me? Fully incorporated! This is not a cake mix. This is not a muffin. Lumps of flour will NOT bake out. They will stick in your cake and mock you. At the same time, try to not deflate the eggs! It really is a delicate balancing act. And no, I’m sorry, I don’t have any pictures of this process. Not having a third arm really cuts into my ability to take pictures and bake at the same time.

Once all the flour is incorporated, pop it into your pan and, if you're doing the 9", toss it in the oven for 25 minutes. If you're doing the sheet pan, pour it into the pan, then take your clean finger and make a moat around the sides so that the cake doesn't stick to the sides of the pan as it bakes. The sheet pan only bakes for about 12 minutes.

The cake is done after it feels firm to the touch. It doesn’t really spring back like you’re used to, but it should hold up against a light touch.


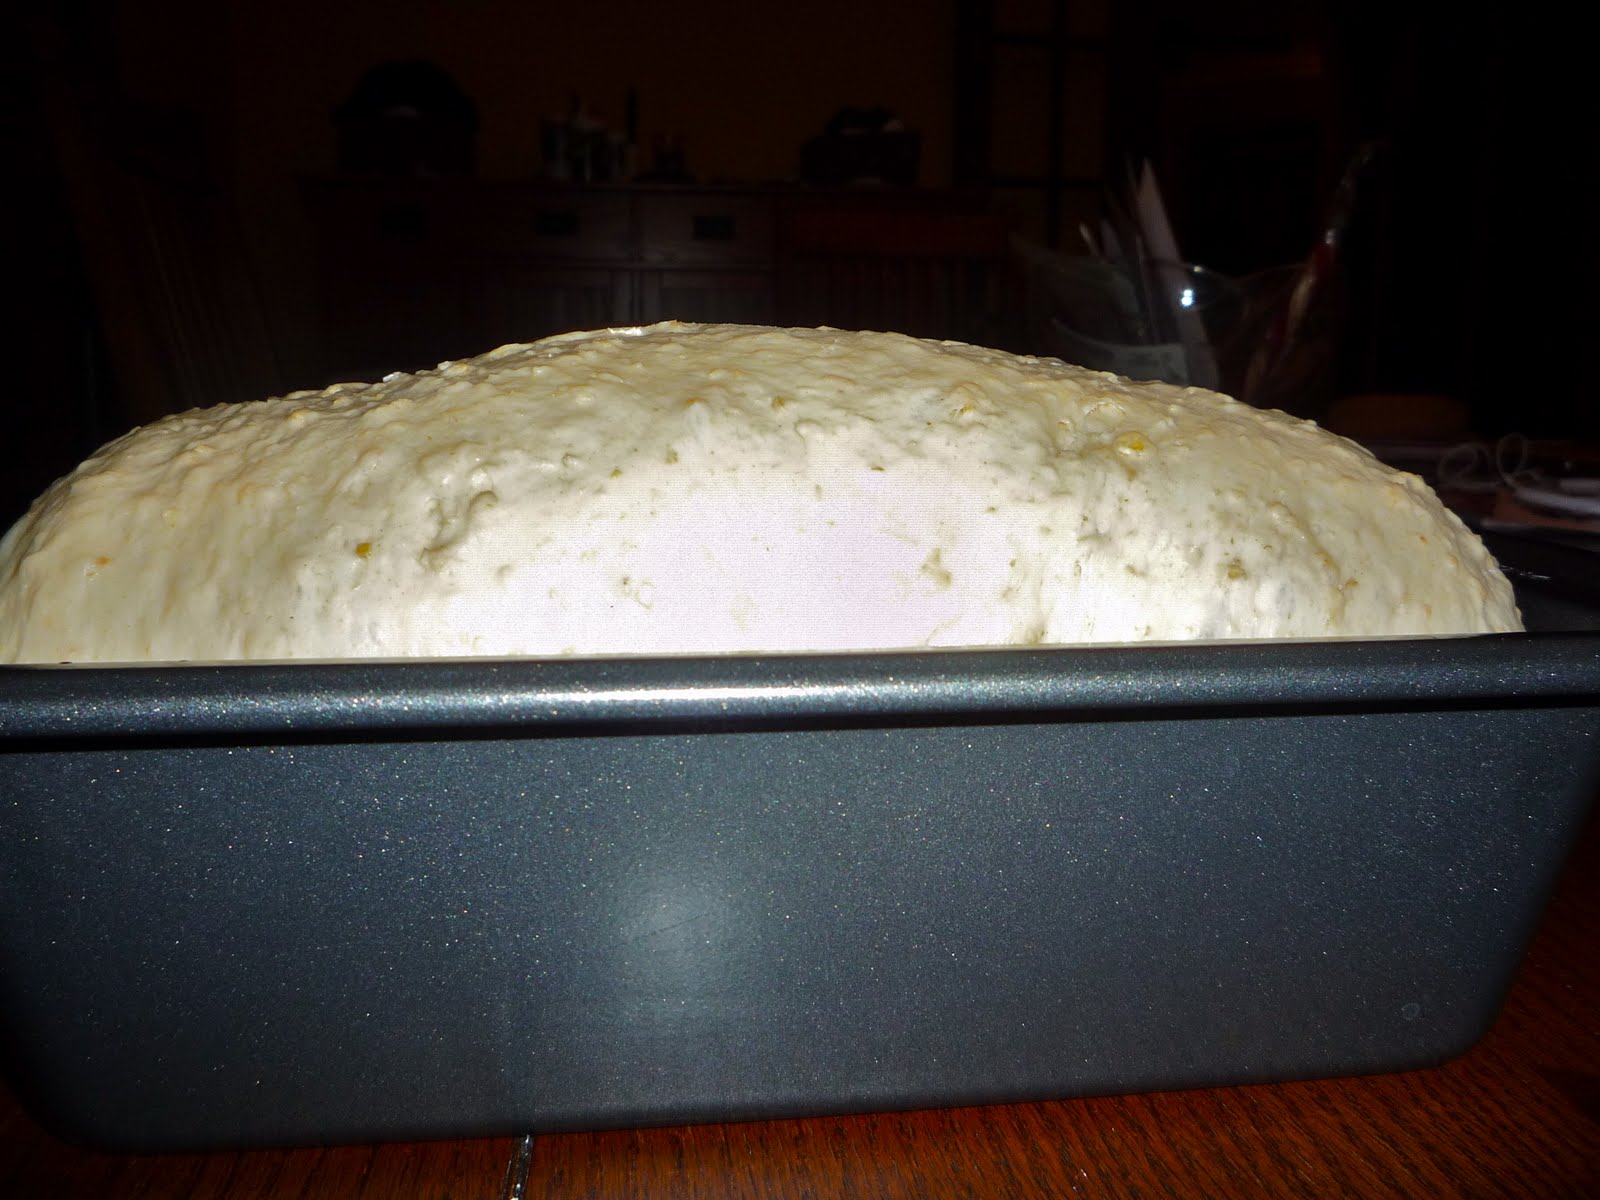
And here’s the finished product! It's delicious, moist and fluffy soft. This is cake you'll just want to eat plain. You have been warned!

Sunday, July 17, 2011

Baking in the Extreme Heat

Too hot to bake!?! Bah! We live in a brick bungalow, which means three things: we don't have central air (gas-forced air wasn't around in the 1920s when this house was built), there are a TON of windows and after a couple of days of high heat, it kind of feels like you're being baked in a brick oven. Our window units just can't keep up! But that doesn't mean I still don't bake. Perish the thought!

Temps here in Chicago have been in the upper 80s, low 90s for about a week now and while I've modified my baking schedule a little, I'm still firing up the oven! As I was staring at a rash on my right arm, trying to decide if it was a heat rash or whether I've developed a late-in-life allergy to peanut butter, I realized there are some tips that you should heed if you step into the kitchen during the hot summer months.

1) If you're working with yeast, expect it to rise FAST. Sometimes, twice as fast as it does during colder months. Try to have it rise in a cooler room in the house (not too cold, mind) to slow the process. Bread that rises too fast tends to not hold its structure as well.

2) Bake early in the morning or later in the evening, especially if your kitchen gets a lot of sun. Baking when the sun isn't at its peak makes a difference.

3) Keep it short. Sure, I love getting everything done at once, but if it's hot out, maybe you shouldn't piggy-back your bread baking with your dog-treat baking. Staying in a hot kitchen for 3 hours is just no fun when it's 90 degrees outside. (This is what I did on Friday when that mysterious rash appeared.) If you do have to bake something a while, try and have it be something that you can put in the oven and walk away from (like the cherry crisp I made last night).

4) If you do have to be in the kitchen while the oven is on, drink lots of water, wear light clothing (but for heaven's sake, don't bake naked because...ew!) and take breaks as often as you can.

So, get out there and bake! Unless you live in Arizona. Then get out to the nearest bakery...but only after the sun goes down.

Saturday, July 9, 2011

Exorcising the Caramel Demons

Back in February when I attended the Baking Boot Camp, we put together a cake that included a caramel ganache. Rick LOVED this cake and requested that I make it for him for his birthday. It's not every year that your husband turns 40, so of course I agreed.

A few weeks ago, I tried to replicate the caramel ganache using the recipe given to us at the Baking Boot Camp. It was an utter failure. We blazed through so many recipes during Baking Boot Camp that the caramel ganache process was a complete blur, except for the admonition by our instructor that we AVOID CRYSTALIZATION AT ALL COSTS. Because if your mixture crystalizes the caramel is ruined and also, it might cause the moon to crash into the Earth. (I wasn't entirely sure on this part.) My mixture did not crystalize, but pretty much everything else that could go wrong did. I'm still not clear where my missteps occurred. Rick's birthday is on Wednesday and I was determined to get the ganache right today. No recipe owns me. I was going to exorcise the caramel ganache demons!

So first thing's first: "I need an old priest and a young priest!" Oh, wait. I'm not trying to get rid of those kinds of demons. Well, it wouldn't hurt to start off with a little heavenly grace on your side.

WHIPPED CARAMEL GANACHE
1 3/4 c. sugar
1/2 c. light corn syrup
1/4 c. water
3 cups heavy cream
1/8 tsp. salt
5 oz. bittersweet chocolate (you can do semi-sweet, but I think it would make the ganache way too sweet)
1/2 c. (that's one stick) unsalted butter, cut into pieces

Heavy cream vs. whipping cream
Will regular whipping cream work? Perhaps. USDA regs state that heavy cream must be at least 36% butterfat and whipping cream just needs to be 30% butterfat. Not a huge difference, but it might be enough to skew your results. And let me just say, I used whipping cream, not heavy cream in my fist go-round which may have contributed to the disaster. I decided to make sure it was heavy cream this time around.

As always, the first step in baking is always to make sure all of your ingredients are at room temperature. This is especially important for this recipe. Pull the heavy cream and butter out of the fridge a couple of hours before you plan on trying the recipe. Or, if it's the summer and you have a hot enclosed porch, put 'em out there for 20 minutes or so. (Baking during the summer months does have its advantages.)

Second, grab a very clean pastry brush and a bowl of water. I like setting them out early so the sugar/water/corn syrup mixture sees it as it's going into the pan. Almost like a warning not to crystalize...or ELSE!

Place the water, corn syrup and sugar in a good-sized saucepan. How good-sized? I make mine in my 2 qt. All-Clad, but I think a 3 qt. would be a little better size for this recipe. At least, the carmelization would go faster. Gently stir the mixture with a spatula to combine. See those clumps on the sides of the pan? Those are sugar crystals. Get 'em off the side and into the liquid or you'll be sorry! The best way to do this? Dunk the pastry brush in the water, and brush it against the sides of the pan just above the crystals. All gone! Make sure you've cleaned the insides of the pan of all crystals before you...

Place the saucepan over medium-high heat. The recipe called for medium heat, but that takes FOREVER to carmelize. When I looked up other caramel sauce recipes online, most recommended medium-high. (Maybe if I was making this in a larger saucepan, I'd go with medium.)

Cook WITHOUT STIRRING until the sugar has dissolved. It's going to be a little hairy here as the mixture will froth up like mad as the sugar dissolves and you need to be prepared with the pastry brush to keep any crystals off the insides of the pan. N'inquiete pas, mes amis! Once the sugar has dissolved and the mixture has turned a nice golden color (kind of a pale yellow), it's safe to stir, but do so VERY carefully to prevent a flare up of crystals on the sides of the pan.

Why am I harping so much about preventing crystals? It's chemistry, folks, and we all know how I feel about science (bleh). Basically, once the sugar/water mixture crystalizes, you can't salvage it. It's a gritty mess and it's going to stay a gritty mess no matter what you do.

Turn the heat down to medium to medium-low. Now, the trick is to watch and wait for the mixture to turn a deep amber color. This could take anywhere from 5 to 10 minutes. Keep an eye on it as once it starts turning darker, it goes very quickly.

Once it has turned nice rich amber color (the darker the color, the more flavor you'll get, but too dark and it's burned), take it off the heat and add carefully and slowly add in the heavy cream while stirring the whole time. Careful, it's going to steam like the dickens. Return it to the heat. The recipe says to use a whisk to stir in the cream and I did this time around, but I think a spatula is a better bet. The caramel cools as soon as the room temp heavy cream hits it and it gets stuck in the whisk tines. Just use a spatula and keep stirring and it should be okay.

Keep stirring until the caramel is smooth again. This will take a few minutes. Add in the butter, chocolate and salt. Stir again until the mixture is smooth. Again, this will take a few minutes and the chocolate won't entirely combine in with the caramel. You'll still see little flecks of it in the mixture.

Take it off the heat and pour the mixture into a large, shallow dish or a large bowl and let it cool to room temperature. It will take at least 30 minutes, but maybe more. I set mine atop a couple of ice packs covered with a towel and left it for almost an hour and a half.

When you're ready to use it, transfer it to a bowl--unless it's already in one--and using a handheld electric mixer, whip it until it's lightened in color and it's creamy in texture--kind of like whipped cream, though a little denser.

I then toss mine in the fridge for a bit to really set it up. I use this ganache to layer a cake and it needs to stand up to the 3 layers. A soft whipped ganache just won't do.

I just checked and the ganache is perfect! Hope it makes it through the night because I'm not putting this baby together until tomorrow!

Friday, July 8, 2011

Oh, hai!

So, it's summer again, which means gardening season and not baking, right? Erm...not entirely. See, we sort of skipped over spring entirely and what I mean by that is that we couldn't get our veggie plants in the ground for fear of frost until early June. Yes, that's right, peeps--early June. That's the latest we've ever planted and I'm nervous that this growing season is going to be a complete bust. Our plants are growing, but not that much.

It's disappointing, too, because we finally got the landscaper out to rid us of some extra boxwoods, a lilac that was "in the way" and an arbor vitae that was beautiful, but also a major sunblocker. We've essentially doubled our growing space. Normally, this would be a source of major excitement (I still secretly hope to convince the hubs to remove ALL of the landscaping from the backyard and maybe put in a greenhouse along the north fence so we an keep growing cold weather veggies all winter), but we had a cool June and--so far--a very dry July.

To compound matters further, the normally reliable Twins are having just an awful season (comparably) and the Cubs are still employing Jim Hendry. So, I'm having a hard time rooting for baseball this season, either.

But I am still baking! Marcus still needs his bread and I've got to get through a dozen eggs a week (through our CSA), so that will have to take the place of therapeutic weeding...though there's plenty of that to be done this weekend. Yay.

Sunday, March 20, 2011

The Chopping Block...Redux

ARTISAN BREADS

Holy yeast breads, Batman! During my Baking Boot Camp experience, one of our teacher-chefs, Carolyn, told us that she was going to be teaching a class called Artisan Breads in mid-March. A few weeks after the Boot Camp was over, I signed up for the class. The class description said we were going to bake 7 bread recipes: whole grain dinner rolls, challah, English muffins, whole wheat pita, sourdough ciabatta, marble rye, and rosemary breadsticks. Mostly, I was interested in the ciabatta bread. But seriously? Seven yeast breads in 6 hours? That's just crazy talk. Especially since we were working sans mixers. That's right--everything we were doing was by hand, including whipping egg whites to medium peaks (bowl + whisk + arm muscles = medium peaks in a little under 3 minutes) and mixing all of our doughs.

Sure, it helps that a lot of the prep was done for us, like the grains already being soaked, the sourdough starter ready to go, a few bowls of flour had already been measured, etc. But still, we got way behind throughout the day and ended up having to cut the rosemary breadsticks from the rotation. I was pretty bummed about that, but we did get the recipe, so maybe I'll try making them on my own.


The whole grain rolls were small--slider-bun sized and very dense--but delicious.


The challah was a relatively easy dough to work with and fun to braid.


The ciabatta dough was crazy wet and a pain to manipulate.


English muffins I've done before and did a better job on my own (the griddle was way too hot and burned everyone's first batch of muffins).


The marble rye was a disaster from the beginning. The dough was way too dry, even though Carolyn insisted that it would get wetter and easier to work with, it never did. She conceded in the end that I needed to add a little water to the dough while I was putting the layers together.


It was fun to learn how to cook pita, though I never did get any of mine to puff up, so they turned out like flatbread, instead. (S'okay, I actually prefer flatbread to pita.)


The only complaint I had about the entire day was my partner. If you sign up for a $150 class that's entitled "Artisan Breads," don't you think you'd be interested in, I don't know, baking bread? My partner, Trisha, wasn't. In fact, she made it clear in my first 5 minutes chatting with her that 1) she was not a baker and disliked baking because it was too precise, 2) that she was single (something she just kept bringing up randomly throughout the day) and 3) that eating carbs was bad because it made you fat (mind you, Trisha is about 100 pounds heavier than I am). Please people, if baking isn't your thing, don't take a higher level bakery class and whine the entire time. It's incredibly grating to the rest of the people there.


CHUCK PANEL
After I was done at The Chopping Block, Rick picked me up and after a quick bite at Jason's Deli, we headed to C2E2 (Chicago Comic and Entertainment Expo). One of our favorite television shows, Chuck, was headlining a panel of some of the actors and the producer. It was first experience at a comic-book style convention. I used to think I was a geek. I'm nowhere NEAR geeky enough. My geek credentials have been revoked after attending that con.


Before the panel started, Warner Brothers' representative got up and presented a really cool recap/preview clip of the show. It got a lot of laughs and got me all choked up and wanting to start watching all over again from the beginning.

Mo Ryan, a TV critic for AOL who is based in Chicago, moderated the panel. On the panel? Chris Fedak, the co-producer, Josh Gomez (Morgan), Ryan McPartlin (Devon "Captain Awesome" Woodcomb), Vik Sahay (Lester) and Scott Krinsky (Jeff). They answered Mo's questions and then took questions from the audience. Both Mo and the audience brought up the possibility of returning to more storylines revolving around the Buy More. Fedak (rightly, though unfortunately) pointed out that "Chuck" is one of the fastest moving TV shows currently on air. They usually are trying to fit in three storylines--BuyMore, spy life and family (Devon, Ellie and Clara)--into 43 minutes every episode.

What I loved most about the panel was how funny everyone was! Ryan was riffing off of Josh and taking heat for being the first one to talk. Vik was continuing his "Jeffster is not one character!" rant and lamenting his rare exodus from the Buy More. We got to hear about how Awesome originally was slated to be a Russian mole 3 episodes into the show, but Fedak and Schwartz loved Ryan's delivery in the Pilot episode so much, they decided to keep him. We were told a few minor spoilers, like they had just gotten done shooting the bachelor party (like, literally that morning at 1:30 AM) episode and everyone was in it. It was hilarious and while it would have been nice to have Zachary Levi and Yvonne Strahovski there, I was just thrilled with the actors that did come.

GARDENING


It's that time of year again! Time for me to actually start trimming back everything that died late last fall. The seedum is always the first thing to peek up through the soil.

We're thinking of hiring people to come in and mulch everything this year. It's just way too much work for two people to do and would take probably at least two weekends of 8 hour per day work. Ugh. If we do hire people, we're going to ask them to pull out the boxwoods and arbor vitae against the garage so we have more vegetable growing space. I think I'm finally ready to dedicate a portion of our yard to asparagus (which is a perennial, so it comes up in the same spot every year).

Sunday, March 13, 2011

Occasionally, I Cook..with Lentils!

Ordinarily speaking, cooking is my husband's realm, not mine. I'm what I like to call a "modified vegan." I'm a lactose-intolerant vegetarian who doesn't like the taste of egg yolks. Yummy cheeses like Asiago, Parmesan and Cheddar are all a go, but anything with a milk or cream base is out. I bake with eggs, but prefer not to eat them by themselves. Finding food I can eat that is healthy is a bit of a chore and I find little joy in chopping and simmering and braising (not that you do that a lot in modified vegan cooking). I picked up some vegan cookbooks recently and that's led to me cooking a little more than usual.

In modified vegan cooking, you get a lot of protein from legumes, seeds and nuts. Since I'm also not a huge fan of nuts (I like them in chocolate, does that count?), I pretty much stick to the seeds (think, whole grains) and legumes. Speaking of legumes, lentils are just about my favorite legume around because they're so stinkin' versatile! They are PACKED with protein and they cook faster than any other beans out there. Best of all, my meat-eating husband likes them. A few people have been asking for lentil recipes lately, so here are a few of my favorites:

LENTIL LOAF
(modified from a recipe from Allrecipes.com)

1 1/8 cups green or red lentils
2 1/4 cups water
6 slices whole wheat bread, torn into small pieces
3 eggs
1 cup vegetable broth (can sub water)
2 tbsp. ketchup
1/2 tsp. dried basil
1/4 tsp. garlic powder
1/2 tsp. black pepper
1 tsp. dried parsley
1 1/2 tbsp. olive oil
1 packet dry vegetable soup mix (onion works fine, too)
1/3 cup bread crumbs

1. Combine lentils and water in small saucepan. Bring to a boil. Reduce heat and simmer until tender, about 40 minutes.

2. Preheat oven to 400 degrees. Grease a 9x5 laof pan.

3. In a large bowl mix together 2 cups cooked lentils (you'll have a little more than that), bread, eggs, broth, ketchup, basil, garlic powder, black pepper, parsley, olive oil and dry soup mix. Spread into prepared pan.

4. Bake for 40 minutes. Sprinkle top with dry bread crumbs and continue baking another 10 minutes. Let sit 10 minutes before serving.

We usually serve this with some rosemary roasted potatoes and green beans.


CHIPOTLE LENTIL BURGERS
(from Appetite for Reduction by Isa Chandra Moskowitz, modified slightly)

1 tsp. (or thereabouts) olive oil (and a little more for frying)
1 small red onion, cut into medium dice
1/2 pound zucchini, halved lengthwise and sliced 1/2 inch thick (think, half moons)
3 cloves garlic, minced
1 cup lightly packed fresh cilantro, chopped (stems and leaves)
1 1/4 cups cooked lentils
1 1/2 cups bread crumbs, divided (that means you're not using them all at once!)
1/4 cup chipotles in adobe sauce, seeds removed
2 tbsp. soy sauce or tamari
2 tsp red wine vinegar
1/4 tsp salt
2 tsp. smoked paprika

1. Preheat the oil in a large non-stick pan over medium high heat. Saute the onion for about 3 minutes. Add the zucchini, garlic, cilantro and a pinch of salt and saute for 7-10 minutes, until the zucchini is soft.

2. Transfer zucchini mixture to a food processor. Add all the other ingredients EXCEPT 1 cup bread crumbs. Pulse until mostly smooth, but there should still be a little texture. (Make sure you're removing the cap from the top of the food processor every now and then to let the steam escape.) Transfer the mixture to a large mixing bowl.

3. Preheat a pan and a teaspoon or two of olive oil (you're frying the burgers, so make sure it's one that you can flip burgers in) over medium heat. Add the remaining 1 cup of bread crumbs to the burger mixture and use a fork to thoroughly combine.

4. Divide the burger mixture into 6 equal pieces. Form the portions into patties and cook for about 12 minutes, flipping the burgers often until they are nicely browned on both sides.

Serve them on toasted bread or burger buns. Be warned--they are a little spicy and kids probably will not appreciate them.


LENTIL SLOPPY JOES
(from Vital Juice Recipes)

2 cups lentils, rinsed
1/2 tsp. salt
1 large onion, chopped
3 cloves garlic, minced
2 15 oz. cans tomato sauce
2 tbsp BBQ sauce
2 tbsp. tamari (I'm sure soy sauce would be fine)
1 tbsp. maple syrup
1 tbsp. mustard
1 tbsp. paprika
couple of pinches of black pepper

1. Bring 8 cups of water and lentils to boil in a large pot. Reduce heat to simmer and cover. Simmer for 20 minutes or until the lentils are tender.

2. Remove from heat and drain off excess water. Return pot to low heat. Add the rest of the ingredients and simmer about 10 minutes. Add pepper to taste.

Serve on whole wheat buns (or open-faced sprouted wheat bread, which is what I did).


TOMATO CURRY LENTIL STEW
(from Allrecipes.com)

1/2 c. dry lentils
1 cup vegetable broth
5 oz. stewed tomatoes
2 tbsp chopped onion
2 stalks celery, chopped with leaves
1/4 tsp curry powder (I usually throw in a little more)
2 cloves garlic, minced (you could use more, but it gives me heartburn)
salt and pepper to taste

1. Combine lentils and broth and bring to a boil.

2. Lower heat to simmer. Add tomatoes, onion and celery. Cover and let simmer 45 minutes. Check every 15 minutes to stir and add water if necessary. Add spices in the last 15 minutes. Taste and re-spice if necessary before serving.

I eat this with basmati rice (brown basmati if you like it--it's better for you).

Sunday, March 6, 2011

Woman Does Not Live By Bread Alone...But She Probably Could

A friend of mine recently told me that she wasn't quite sure how to shape a basic loaf of bread. It's the start of another month, which means that I need to bake a couple of loaves of Oatmeal Bread for my massage therapist, Marcus*, so I figured I would blog about it.

*Marcus treats my various shin and foot ailments in order to keep me running. He also likes being part of an underground economy, so instead of paying him, I give him two loaves of bread a month.

I use the following Oatmeal Toasting and Sandwich Bread recipe from King Arthur Flour.

3 cups KAF Bread Flour
1 cup old fashioned oats
2 tblsp butter
1 1/2 tsp salt
3 tblsp honey OR brown sugar (I use honey)
2 tsp instant yeast or 1 packet dry active yeast (I always use instant, but if you're using the dry active, then dissolve it warm milk before adding to the remaining ingredients)
1 1/4 cups lukewarm milk (around 100 degrees)

Mixing the dough
In a bowl of your electric mixer (or in a large mixing bowl, if you are looking to build up your arm muscles), combine all of the ingredients, mixing to form a shaggy dough. "Shaggy" means rough and uneven. See?

Sometimes, the dough is just a little dry--those oats soak up a lot of moisture! If you find that the ingredients are just not coming together, then you can add a small amount of water. Here's how I do it: Place your hand under the faucet and wet it. Then sprinkle the water from your wet hand onto the dough.


I know this is only adding a tiny amount, but you usually only need a very small amount of water to bring a dough together and adding too much means you have to add more flour and then your ratio of ingredients is off... Trust me, this way may mean you have to wet your hand two or three times, but it's better in the long run.

Knead the dough with the mixer for 5 minutes. or until it's smooth. (If you're kneading by hand, it usually takes about twice as long.


Place the dough in a lightly greased bowl, cover and let it rise for an hour. It will get puffy, but may not double in size.


See? Not exactly double, but plenty puffy!


Shaping the Loaves

Lightly grease or oil your countertop. Take the dough out of the bowl and place it on the countertop. If you're making a double batch, then divide it in half and keep the one half covered while you're working with the other. Pat or roll the dough into approximately a rectangle about 9x15". I like to place the bread pan at the top of the counter to make sure I don't pat it out too wide. (Yes, you do have to tuck the ends under, but it also lengthens when you roll it up.)


Then, making sure you start with a tight roll at the beginning, roll the dough up into a log shape.


Pinch the seam closed with your fingers (my preferred way) or roll the seam under your palm until it's closed.


Then, take the ends of the bread log and tuck them under towards the seam side--so you have a nice, uniform top to your bread and all the seams and tucking are on the bottom. Pinch the tucks closed into the log. So it looks like this:


Place the dough in your lightly greased 9"x5" pan, cover it and place it in a warmish area to rise again.


Once it's risen to about 1"-2" over the lip of the pan, preheat your oven to 350 degrees. It's time to bake it!


The recipe says to bake it for about 35-40 minutes, but I almost always find that it needs a few more minutes in the oven--and my oven runs warm. I think it's usually about 43 minutes for me. If the loaves are browning too quickly (always does in my oven) tent the loaf with aluminum foil for the final 10 minutes of baking.


Ah...there's nothing quite like the smell of baking bread. Once it's done, remove the loaves from the oven, take them out of the pans immediately and set the loaves on a wire rack to cool.


If you're a small household like us, or just don't eat a lot of bread, this is a great recipe because it freezes fantastically. Just slice the loaf up, wrap slices in heavy duty foil (I do four at a time) and pop it in a freezer bag. I've eaten bread that's been in the freezer for 3 months and didn't taste much different. Plus, it's SO much better than keeping it in the fridge for a long period of time where the loaf just goes stale.

Woo! All this bread baking has got me excited for the artisan bread baking class I'm taking at The Chopping Block in a couple of weeks!

Tuesday, February 22, 2011

Baking Boot Camp, Day Three

The final day of Baking Boot Camp and I had a tag-along with me on my trip to The Chopping Block since Rick was taking a knife skills course that started at the same time as our final day. On arrival, I met our instructor and sous chef for the final day: Chef Paul and Chef Graeme.


Chef Paul worked kitchen jobs in college. He graduated from Purdue (my dad's graduate alma mater) with a degree in electrical engineering. He worked for a few years in an engineering firm before he decided that he missed the restaurant world and went to culinary school. He's worked his way up to executive chef and owned his own bakery/diner.

Chef Paul had made us up a phenomenal breakfast. Scrambled eggs with Parmesan and fresh herbs (and bacon, for the meat-eaters) in a whole wheat pita, pumpkin scones with maple glaze, died fruits and nuts and plain Greek yogurt. I could have easily eaten about 6 of the scones and they are one of my least favorite baked goods. So tender and moist!


The real bummer of this day was that Noelle finally succumb to her head cold and called in sick, so I was partner-less for the day. Gah! So much work to do!

Speaking of partners, here's Jen and Tim getting ready to get down to business on our last day!


Here was how the day played out:

Pie Crust: Yes, we had made an extra pie crust on our first day, but we had cut the butter in by hand (all the food processors were being used by another class) and the dough ended up being very dry. Chef Paul wanted us to start over, this time using a food processor. It came together much better. I actually prefer not to use food processors for much in the kitchen, but this is the task for them. It allows the butter to remain cool, yet still get broken down to the pea-sized state it should be in. Patted that into a disk and threw it in the fridge.


Linda and Diana with their pie crust


Almond Paste: Chef Paul showed us how to put together a good almond paste to stuff our croissants with. I'm not a huge almond fan, but it was delicious! I wonder if I could make up something similar with hazelnuts. I'd have to find hazelnut extract...


Shaping and Baking Croissants: I thought the roll-out for the final step of shaping and proofing the croissants was going to be a nightmare. Our dough had so many sticking issues on Day Two, I was basically imagining a buttery mess. Thankfully, it had sufficiently cooled overnight in the fridge and rolled out like a charm (unlike my rolling out experiences at home). I learned some great tips for cutting into croissant shapes and was taught how to add paste and chocolate to crescent shaped croissants. Croissants were proofed and then baked and came out looking (and tasting) delicious.


To be honest, I prefer my recipe. The croissants tasted okay, but the layers did not seem to be as crisp and flaky as the Epicurious.com recipe. Interestingly, the good folks at King Arthur Flour blogged a croissant recipe VERY similar to the recipe given to us at the boot camp on our last day of boot camp. I'll probably have to try it again to make my final decision, but it seems like the epicurious.com recipe is more French--the way the layers explode in your mouth when you bite into them--and the recipe we did in the Baking Boot Camp is more what Americans think croissants should taste like--softer and more pliable.


Lemon Lavender Cookies: We got our cookie dough logs out of the fridge, cut them into slices (about 1/3" thick) and tossed them in the oven.

Once they came out, we frosted them with a simple vanilla frosting and topped them with lavender buds and the candied lemon peel.


Creme Brulee: We pulled the ramekins we filled yesterday out of the fridge.


A little sugar sprinkled on top, a propane torch and these puppies were bruleed!


Linzer Cookies: What can I say? It's a Linzer Cookie recipe. Jen helped me with all the cut-outs. It was tough doing it all on my own!


Pie Tart: We rolled out our pie crust and fit it into the tart pan.

I had a few thin spots so I bulked them up with a little of the extra crust. After poking holes in the bottom, we put down a sheet of parchment paper and filled each tart pan with pie crust weights. The crusts went into the oven to bake. Meanwhile, we made the tart filling.

Tart Pan all Baked with the filling ready to be poured in! Once the tart filling was in, we dropped in a few raspberries and those went into the oven to bake.


All done!


Italian Buttercream: On our first day, Chef Ethan was going over the different tasks we'd be accomplishing each day. I asked if we were going to be doing an Italian Buttercream, he said no. He was lying. If you're wondering what an Italian Buttercream is, let me preface the process by first saying that what you usually think of as a buttercream frosting is fake. It's not a frosting that a baker would call "buttercream." (This may explain the confused answer from Chef Ethan.) Italian Buttercream is a made in the following manner: 1) Take eggs and whip the living bejeezus out of them until they reach the ribbon stage. That's where, when you pull the beaters out of the egg mixture, the beaters trail a ribbon on the mixture that isn't immediately reabsorbed. 2) Meanwhile, you should be cooking a simple syrup to a softball stage (exactly 240 degrees) on a stove. What's the softball stage? Well, you dip your fingers in boiling syrup to see if you can form a soft ball with it. Sound insane? Pastry chefs are a special kind of crazy. Thankfully, Chef Paul took care of checking this for us. 3) While you're cooking the syrup, you should also be melting the chocolate in a double boiler. This is a chocolate buttercream frosting, by the way. 4) Once your syrup hits the softball stage AND your eggs are whipped to the ribbon stage, you pour the syrup down the side of the bowl (if you pour it directly into the eggs, it will cook them) while you're constantly mixing. 5) Once all of the syrup has been incorporated, you add the butter, a piece at a time. When I started doing this, the mixture lost a ton of volume. Chef Paul came over and pulled my bowl and the butter and threw them into the fridge. He then collected everyone else's bowls and butter and put them in the fridge, too. Apparently, the kitchen was way too hot and had heated the butter too much. He was worried the frosting wasn't going to be salvageable. After 20 minutes or so, we pulled them out and all that worry was for naught. 6) After the butter is all incorporated, I whipped the buttercream for another several minutes to help add more volume. 7) Pour in the melted chocolate while continuing to beat the frosting. And...Bob's your uncle! Italian Chocolate Buttercream frosting. The flavor is the comparable to the fake stuff, BUT the texture! *dies* It's like silk on your tongue!


Chef Paul pouring syrup into my whipped eggs.


Frosting the Cake: We cut the two Devil's Food Cake layers we baked on Saturday in half horizontally. Yes, this is a 4 layer cake. Since we didn't have cake stands, we ended up putting the cooled cake layers on upturned cake pans.

Apparently, I'm not the only person who uses those in a pinch. The caramel ganache went between each layer. We did a crumb coat with the buttercream--which is basically just a thin coat of frosting that keeps the cake from showing through.


After a quick trip to the fridge, we pulled the cakes back out and finished with another layer of buttercream. We were then presented with the option of coating the sides in roasted hazelnuts. Hazelnuts are my favorite kind of nut, but I'm generally opposed to nuts in baked goods. When Linda and Diana pulled the nuts out of the bag, the aroma hit me and I was sold! The nuts went on the side of the cake.


Then it hit me: Noelle's not here. I have to take all of this home...on the Metra. Chef Carolyn from Day 2 popped into our room to see how we were doing and I managed to foist off the chocolate raspberry tart and 2 creme brulees onto her. I gave away a tray of plain croissants to Linda and Diana. I gave another creme brulee to Chef Paul. But still, this is what I had to lug home with me. And yes, the backpack is full.


I was so exhausted by the end of the the day, I literally just wanted to fall in a heap. I never really entertained serious ideas of becoming a pastry chef, but these three days showed me in no uncertain terms that this is not a line of work for me. I haven't done manual labor since my days working at a plant nursery summers in high school and I'd forgotten how physically exhausting it can be. The extra calories burned are just NOT worth it when you're so tired, you feel slightly nauseous.

In all, I had a blast and would highly recommend it, but I'd also make sure that I took the next day off of work in order to recover! Thanks for the memories, guys!